Some recipes earn their name from the way they make a kitchen feel, and this Pinterest image cake is exactly that. I first made it on a rainy Tuesday when my daughter insisted we bake something "pretty enough to post," and by the time the glossy berry glaze caught the window light, even my skeptical teenager was reaching for her phone. It is the kind of cake that turns an ordinary afternoon into a small celebration.
Advertisements1
The magic is simpler than it looks. A tender vanilla sponge bakes in one pan, gets brushed with warm berry syrup, then finishes under a silky whipped cream and a mirror-shine glaze that photographs like something from a bakery window. You do not need fancy piping skills or a stand mixer to pull it off.
If your first attempt looks a little less than perfect, please be gentle with yourself. My own first glaze slid off one side like a small avalanche, and my family ate it anyway with spoons and zero complaints. Baking is practice, not performance, and this cake forgives you beautifully.
Why You'll Love This Recipe
About the Ingredients
1 3/4 cups (220g) all-purpose flour
Spoon the flour into the cup and level it off, or the cake turns dense. Substitute 1:1 gluten-free baking blend if needed, but add 2 tablespoons of milk.
1 1/2 teaspoons baking powder
Check the date on your tin, since older baking powder loses lift fast. You can swap in 1 1/2 teaspoons baking soda plus 1 teaspoon lemon juice in a pinch.
1/2 teaspoon fine sea salt
Fine sea salt dissolves evenly; kosher salt works too if you crush the flakes. Skip table salt with anti-caking additives if you can.
3/4 cup (150g) granulated sugar
White sugar keeps the crumb pale and photo-friendly. Coconut sugar works but darkens the sponge noticeably.
2 large eggs, room temperature
Room-temperature eggs whip to a higher volume, so set them out 30 minutes ahead. Flax eggs (2 tablespoons flax plus 6 tablespoons water) make it egg-free.
3/4 cup (180ml) whole milk
Whole milk gives the richest crumb; oat milk is the closest dairy-free swap. Warm it slightly so it blends without seizing the butter.
1/2 cup (113g) unsalted butter, melted and cooled
Melt, then cool for 5 minutes so it does not cook the eggs. Salted butter works if you drop the added salt to a pinch.
1 teaspoon vanilla extract
Real extract beats imitation every time in a simple cake. Almond extract makes a lovely half-teaspoon substitution for a different aroma.
2 cups (300g) mixed fresh berries
Raspberries, blackberries, and blueberries give the prettiest contrast. Frozen berries work for the syrup but skip them as a topping since they weep.
1 cup (240ml) heavy whipping cream, cold
Cold cream whips fastest, so chill the bowl too. For a lighter option, use 1 1/2 cups Greek yogurt whisked with 2 tablespoons honey.
1/3 cup (80ml) seedless berry jam
Seedless jam gives that clear, glassy finish. Apricot or red currant jelly is the classic bakery substitute.
1 tablespoon fresh lemon juice
The acid balances the sugar and keeps the glaze from tasting flat. Bottled lemon juice is fine, but fresh tastes brighter.
Tips & Tricks
- Do not overmix the batter. Stop the moment the last flour streak disappears, because extra stirring develops gluten and turns the sponge rubbery.
- Cool the cake completely before glazing. Even a slightly warm cake melts the cream and makes the jam slide right off the top.
- Chill the cream and bowl first. Ten minutes in the freezer is enough to get stiff, glossy peaks instead of a soupy drizzle.
- Arrange berries before you glaze. Once the jam sets, moving fruit smears the shine, so place it while the surface is still tacky.
Pro Tips
Step-by-Step Instructions
1. Heat oven and prep pan
Preheat the oven to 350F (175C) and line an 8-inch round pan with parchment. A parchment sling makes lifting the cake out effortless and keeps the edges smooth.
2. Whisk dry ingredients
Whisk the flour, baking powder, and salt together in a medium bowl for 30 seconds. This distributes the leavener so the cake rises evenly instead of doming on one side.
3. Beat eggs and sugar
Beat the eggs and sugar for 3 minutes until pale and thickened, then stir in the milk, melted butter, and vanilla. The mixture should look like thin, glossy custard.
4. Fold and bake
Fold the dry ingredients into the wet in three additions, stopping when just combined, then pour into the pan. Bake 30 to 35 minutes at 350F (175C) until golden brown and a toothpick comes out with only a few moist crumbs, or the center reads 200F (93C).
5. Brush with berry syrup
Stir the lemon juice into 2 tablespoons of the jam with 1 tablespoon hot water, then brush it over the warm cake. You will hear a faint sizzle as the sponge soaks it up.
6. Whip the cream
Whip the cold heavy cream to soft peaks, about 2 minutes, then spread it over the fully cooled cake. Stop at soft peaks, since overwhipped cream looks grainy in photos.
7. Glaze the top
Warm the remaining jam for 20 seconds, let it cool 1 minute, then spoon it over the cream, nudging it to the edges. It should look glossy and just barely drip.
8. Decorate and chill
Arrange the berries on top in loose clusters, then refrigerate 30 minutes before slicing. The cake firms up and the glaze sets to a clean, glassy shine.
Delicious Variations
Chocolate Berry Version
Swap 1/4 cup of the flour for cocoa powder and use raspberry jam for a rich, dramatic finish.
Citrus Cream Cake
Replace the vanilla with orange zest and use lemon curd instead of jam for a bright, sunny twist.
Tropical Glow Cake
Use mango jam and top with kiwi and passion fruit for a vibrant, vacation-feeling centerpiece.
How to Store Pinterest image
Refrigerator
Store in an airtight container in the refrigerator for up to 3 days, keeping berries off the cut edges.
Freezer
Freeze the unglazed sponge, wrapped tightly, for up to 2 months; add cream and glaze after thawing overnight.
Reheating
Serve cold or let it sit at room temperature 15 minutes; never microwave the cream-topped cake.
Frequently Asked Questions
Q: Can I make this Pinterest image cake ahead of time?
Yes, bake the sponge up to 2 days ahead and store it wrapped at room temperature. Add the cream and glaze the same day you plan to serve it so the top stays glossy and crisp-looking.
Q: Why did my glaze slide off the cake?
The cream was likely too warm or the jam too thin when you poured it. Chill the cake for 20 minutes before glazing and warm the jam only until it pours like honey, not until it is hot.
Q: Can I use frozen berries instead of fresh?
Frozen berries work well for the syrup and jam layers, but skip them as a topping. They release water as they thaw and will streak the glaze within an hour.
Q: How do I know when the sponge is fully baked?
The center should read 200F (93C) on an instant-read thermometer, and the top should spring back when lightly pressed. A toothpick should come out with a few moist crumbs, not wet batter.
Q: Can I make this cake gluten-free or dairy-free?
Yes, use a 1:1 gluten-free baking blend and add 2 tablespoons of milk for moisture. For dairy-free, swap in oat milk and a plant-based whipping cream, chilling everything well before whipping.
I would love to see your version of this cake, so snap a photo before the first slice disappears and tag me. Bake it for a birthday, a Tuesday, or simply because you deserve something beautiful on the counter. You are doing better than you think, and this cake is proof that small efforts create lovely moments. Parenting, one mindful moment at a time.
Pinterest image
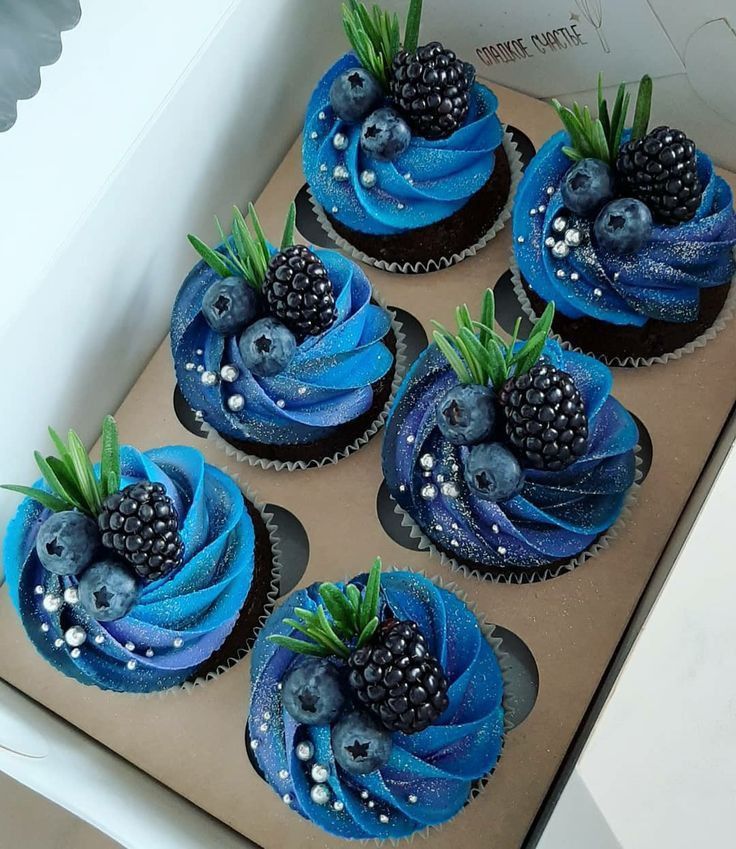
Pinterest image cake is the easy 50-minute showstopper with glossy berry glaze and whipped cream that looks stunning in every photo.
🧂 Ingredients
- 1 3/4 cups (220g) all-purpose flour
- 1 1/2 teaspoons baking powder
- 1/2 teaspoon fine sea salt
- 3/4 cup (150g) granulated sugar
- 2 large eggs, room temperature
- 3/4 cup (180ml) whole milk
- 1/2 cup (113g) unsalted butter, melted and cooled
- 1 teaspoon vanilla extract
- 2 cups (300g) mixed fresh berries
- 1 cup (240ml) heavy whipping cream, cold
- 1/3 cup (80ml) seedless berry jam
- 1 tablespoon fresh lemon juice
📋 Instructions
- 1Heat oven and prep pan — Preheat the oven to 350F (175C) and line an 8-inch round pan with parchment. A parchment sling makes lifting the cake out effortless and keeps the edges smooth.
- 2Whisk dry ingredients — Whisk the flour, baking powder, and salt together in a medium bowl for 30 seconds. This distributes the leavener so the cake rises evenly instead of doming on one side.
- 3Beat eggs and sugar — Beat the eggs and sugar for 3 minutes until pale and thickened, then stir in the milk, melted butter, and vanilla. The mixture should look like thin, glossy custard.
- 4Fold and bake — Fold the dry ingredients into the wet in three additions, stopping when just combined, then pour into the pan. Bake 30 to 35 minutes at 350F (175C) until golden brown and a toothpick comes out with only a few moist crumbs, or the center reads 200F (93C).
- 5Brush with berry syrup — Stir the lemon juice into 2 tablespoons of the jam with 1 tablespoon hot water, then brush it over the warm cake. You will hear a faint sizzle as the sponge soaks it up.
- 6Whip the cream — Whip the cold heavy cream to soft peaks, about 2 minutes, then spread it over the fully cooled cake. Stop at soft peaks, since overwhipped cream looks grainy in photos.
- 7Glaze the top — Warm the remaining jam for 20 seconds, let it cool 1 minute, then spoon it over the cream, nudging it to the edges. It should look glossy and just barely drip.
- 8Decorate and chill — Arrange the berries on top in loose clusters, then refrigerate 30 minutes before slicing. The cake firms up and the glaze sets to a clean, glassy shine.

Aisha writes about parenting and child development, sharing insights from her own journey raising two kids. Her articles focus on nurturing emotional intelligence and creating a calm, connected family life.